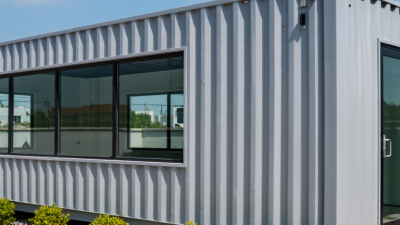
Starting container living begins with a clear question: what should the home do for you? A quiet workspace, a compact family house, or a weekend retreat will each need different layouts. The container is only the shell. It does not arrive ready for comfortable living.
Architect Adam Kalkin is known for exploring shipping containers in residential design. A practical paraphrase of the lesson in his work is: “Treat the container as a starting point, not a finished home.” That distinction matters. Before buying a unit, check its condition, dimensions, and previous use. Then consider insulation, ventilation, daylight, plumbing, and safe access. A steel wall can heat quickly in summer and lose warmth in winter. A small window may look charming in a sketch but leave a room gloomy at noon.
The site matters just as much. Measure the slope, note where rainwater flows, and check whether delivery trucks can reach the plot. Ask local building professionals about permits and technical requirements before committing money. Requirements vary by location. Keep a budget reserve for foundations and utility connections; these costs are easy to underestimate. Container living can be efficient, but it is not automatically cheaper or greener. That part deserves honest scrutiny. A plan may need revision after the first site visit. That is normal. Begin with practical needs, reliable advice, and a design suited to the climate. Then decide whether container living fits your life—not just the photographs.

A container may look ready for a quiet plot, but the site rules come first. Zoning can restrict full-time residence, building size, setbacks, or utility connections. These rules vary by location, so ask the planning office about the specific parcel before paying a deposit. Ask before you buy. Request written guidance, and keep the parcel number and any site plans handy. A casual phone answer may not cover every requirement.
Check flood exposure as well as zoning. Review official flood maps, then ask whether the lot has drainage, access, or elevation concerns. A map is a starting point, not a site inspection. Walk the property after rain if possible; note standing water, soft ground, and nearby ditches. Maps can be imperfect. A local surveyor or qualified site professional can help assess conditions before you commit.
Tips: Ask the building department which permits apply to the foundation, electrical work, plumbing, and occupancy. Requirements may depend on how the container is used and altered. Get the checklist in writing. Confirm whether inspections or engineered plans are needed, and include time for approvals in your budget. I once underestimated how slowly paperwork could move; that part deserves more patience than it seems.
A container home starts with its footprint, not the furniture. ISO 668 gives common external container lengths of 6.058 m and 12.192 m, often called 20-foot and 40-foot formats. These figures describe the outside, not the clear floor area. Corner fittings, wall thickness, insulation, and interior finishes all reduce usable space. Measure twice.
A 6.058 m unit can suit a simple studio: keep the bathroom and kitchenette near one end, and leave the brighter side open for sleeping and sitting. Check door swings and appliance depth on the plan; a fridge door can steal more room than expected. With a 12.192 m unit, a separate sleeping nook becomes more realistic, while plumbing grouped along one wall can simplify the layout. Still, extra length does not automatically make a home comfortable. A narrow passage or poorly placed window can make the space feel awkward. Before cutting openings, confirm dimensions on the actual unit and ask a qualified building professional to assess structural changes. Draw the layout at full scale with tape on the floor if possible. It may expose a flaw the tidy plan missed.
ISO 668 specifies nominal external lengths of 6.058 m for a 20-foot container and 12.192 m for a 40-foot container. Use these lengths as an initial guide when planning your living layout; usable interior space is smaller and can vary by container type.
How to Start Container Living?
Before changing a container’s walls, inspect its CSC plate and structural condition. The plate records key information, but it does not prove the container remains sound after damage or alterations. Check the plate is legible, then compare its details with the container’s history where available. Look closely at corner castings, roof seams, floor edges, and existing welds. Blistered paint, deep pitting, or fresh patches deserve attention. Rust can hide beneath a tidy coat.
Walls help carry loads toward the corner posts and end frames. Cutting a large opening may interrupt that path and shift forces into parts not designed to bear them. Mark proposed openings and have a qualified structural professional assess reinforcement before cutting. A small test opening can still create a big problem. I would not judge strength by appearance alone; even a clean-looking container can have hidden corrosion or distorted framing. That uncertainty is worth respecting.
Tips: Photograph the CSC plate and damaged areas. Probe suspicious corrosion gently, and avoid cutting until the load path is reviewed. Ask for a written assessment when the container’s condition is unclear. Do not assume a previous owner’s modifications were properly reinforced.
| Inspection Area | What to Check | Example Field Record | Why It Matters | Recommended Next Step |
|---|---|---|---|---|
| CSC safety approval plate | Read the plate for the container’s identification number, approval reference, manufacture date, and inspection or examination details where shown. | Plate present and legible; identification number recorded; most recent examination information transcribed for verification. | The plate provides safety-approval information. It does not, by itself, confirm that a used container is undamaged or suitable for a dwelling conversion. | Photograph the plate and verify its details with the relevant inspection records or competent inspection authority. |
| Maximum gross mass and tare | Record the maximum gross mass and tare mass marked on the container; compare them with transport and project documents. | Example plate values: maximum gross mass 30,480 kg; tare mass 2,250 kg; calculated payload 28,230 kg. | Payload is the difference between maximum gross mass and tare mass. These transport ratings are not a design approval for building loads or altered structural conditions. | Keep the marked ratings in the project file. Have a qualified structural professional assess proposed building loads and any changes to the container. |
| Corner posts and corner fittings | Inspect all four corner posts, top and bottom corner fittings, and their welded connections for dents, distortion, cracks, or corrosion. | Front-left post: light surface rust; no visible distortion. Rear-right corner fitting: coating loss; close inspection required. | Corner posts and fittings form important parts of the container’s load-transfer system, especially when containers are stacked or supported at their corners. | Do not conceal damage with cladding. Request a competent structural inspection if distortion, cracking, or significant section loss is found. |
| Roof, side rails, and end rails | Check the upper and lower side rails, end rails, roof edges, and rail-to-post connections for deformation, corrosion, and failed welds. | Lower side rail: approximately 120 mm area of coating failure with surface rust; no obvious perforation during visual check. | Rails connect structural components and help transfer loads. Their condition can affect the behavior of the frame and the wall panels. | Clean and assess suspect areas. Measure remaining steel thickness where corrosion is more than superficial; use professional assessment if section loss is present. |
| Side-wall corrugations and proposed opening | Map the proposed door or window cut against wall corrugations, posts, rails, and any existing repairs. Check both sides of the panel where accessible. | Proposed opening: 900 mm × 2,100 mm; it intersects several corrugations and is 350 mm from a corner post. | Corrugated wall panels contribute to the container’s overall behavior. Cutting them can change stiffness and load distribution; distance from a post alone does not establish safety. | Do not cut until a qualified structural professional has designed the opening, any reinforcement, and the required connection details. |
| Corrosion and steel thickness | Record corrosion location and extent. Where needed, remove loose scale and use a suitable calibrated ultrasonic thickness gauge on prepared steel. | Example reading at a cleaned, accessible panel location: 1.4 mm remaining thickness; adjacent readings range from 1.3 to 1.6 mm. | A single thickness reading cannot establish structural capacity. Original thickness varies by component, and pitting can make isolated readings misleading. | Compare readings with reliable component information and obtain a professional assessment for pitting, perforation, widespread corrosion, or uncertain original thickness. |
| Floor and cross-members | Inspect the floor for soft spots, water damage, delamination, contamination, and signs of corrosion or damage to the supporting cross-members. | Floor near the doorway feels firm under a careful walk-through; one area has a visible water stain and requires closer inspection. | Interior finishes can hide floor or support damage. A sound-looking surface does not confirm the condition of concealed members. | Investigate stained or soft areas before installing interior finishes or placing concentrated equipment loads. |
| Support points and foundation | Document how the container will bear on the foundation, including support locations, level, drainage, and any planned stacking. | Concept plan shows four corner supports; final bearing details and foundation design have not yet been verified. | Support conditions determine how loads enter the container frame. The appropriate foundation and bearing arrangement depend on the site and design loads. | Have the foundation and support details checked for the site, intended use, and applicable local requirements before installation. |
| Load-path review before modification | Trace intended loads from roof and added framing through rails, posts, fittings, supports, and foundation. Include wind, snow, and any stacked loads where applicable. | Wall opening and added roof insulation are proposed; load-path review has not been completed. | New openings, added materials, and changed supports can alter how forces move through the structure. Transport ratings do not replace a building-structure assessment. | Obtain a site-specific structural design before cutting walls, removing panels, stacking units, or adding substantial loads. |
Container living starts with a code check, not a roll of foam. Ask your building department which IECC edition and local amendments apply; adoption varies by jurisdiction. The 2021 IECC sets blower-door limits of 5 air changes per hour at 50 pascals (ACH50) in climate zones 1–2, and 3 ACH50 in zones 3–8 (Section R402.4.1.2). That is a measurable target, not a comfort guarantee. Its prescriptive tables also assign insulation levels by climate zone and building assembly, so generic container-kit advice may miss local requirements.
Steel conducts heat readily. Thin interior batts can leave cold ribs and condensation-prone surfaces. Continuous exterior insulation can reduce thermal bridging, but details around doors, corners, and floor edges matter. Small gaps count. Before closing walls, photograph the insulation and seal around service penetrations; corrugated surfaces make missed spots easy. Avoid choosing a vapor-control layer by guesswork, since the right assembly depends on climate and wall design.
ASHRAE Standard 62.2-2022 bases residential ventilation on dwelling size and bedroom count, with local exhaust for kitchens and bathrooms. Have a qualified designer calculate airflow, then verify fan delivery with a flow hood or calibrated meter. Discharge exhaust outdoors and plan a makeup-air path. An oversized fan can waste conditioned air; an undersized one can leave moisture behind. A bathroom mirror that clears slowly is a clue, not a ventilation test. I would not guess here.
A container home needs a foundation designed for the site, not just the container’s weight. Soil conditions, slope, drainage, frost depth, and wind exposure can all affect the design. A geotechnical professional or structural engineer can assess these factors and specify suitable footings or piers. Local building officials can clarify required plans and inspections before work begins. Small errors matter: a low corner can twist the frame and make doors difficult to close.
Utility connections need the same careful planning. Ask the local authority about permits, inspections, and connection requirements for electricity, drinking water, wastewater, and stormwater. Keep service routes accessible, and confirm that electrical grounding and plumbing materials meet applicable codes. Cutting openings for pipes, wiring, or windows may weaken a container’s structure, so have the changes reviewed by a qualified professional. That part is easy to underestimate. A neat sketch is not an engineering plan, and requirements vary by location. I would leave room in the schedule for revisions; even a well-prepared application may need another detail or inspection before approval.