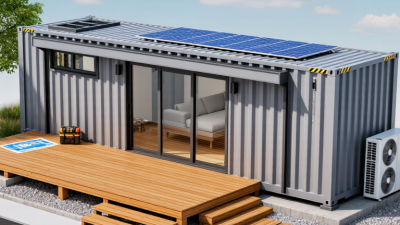
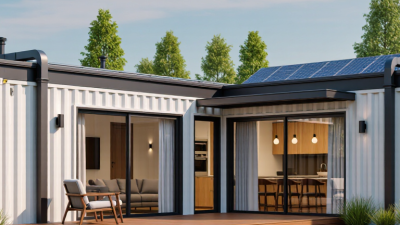
How to Create a Shipping Container Living Space is more than a design question. It is a sequence of practical decisions, from choosing a sound container to planning insulation, ventilation, and safe services. A shipping container living space can feel warm and inviting, but steel transfers heat quickly and may collect condensation without careful detailing. Start with the site. Check access for delivery, drainage, ground stability, and local building requirements before ordering a container. Small oversights matter.
The container’s condition deserves close inspection. Look for corrosion, damaged corners, repaired areas, and a floor that may need assessment before reuse. Then shape the layout around daily routines: a clear path from the entry, daylight near the living area, and storage that does not block ventilation. Use insulation suited to the climate, and plan continuous air and moisture control rather than treating them as afterthoughts. Fresh air matters. Electrical, plumbing, heating, and structural changes should be designed or reviewed by qualified professionals, with permits confirmed where required. A narrow opening may look elegant on paper, yet reduce useful wall space or complicate reinforcement. That trade-off is easy to miss.
This guide follows the project from site preparation and container selection through layout, insulation, utilities, and finishing. It focuses on choices that affect comfort, durability, and cost—not just polished photographs. Still, no single plan fits every climate or household. A container home can be compact and practical, but it is not automatically cheaper or simpler than conventional construction. Careful measurements help. So does revising the plan when real conditions disagree.
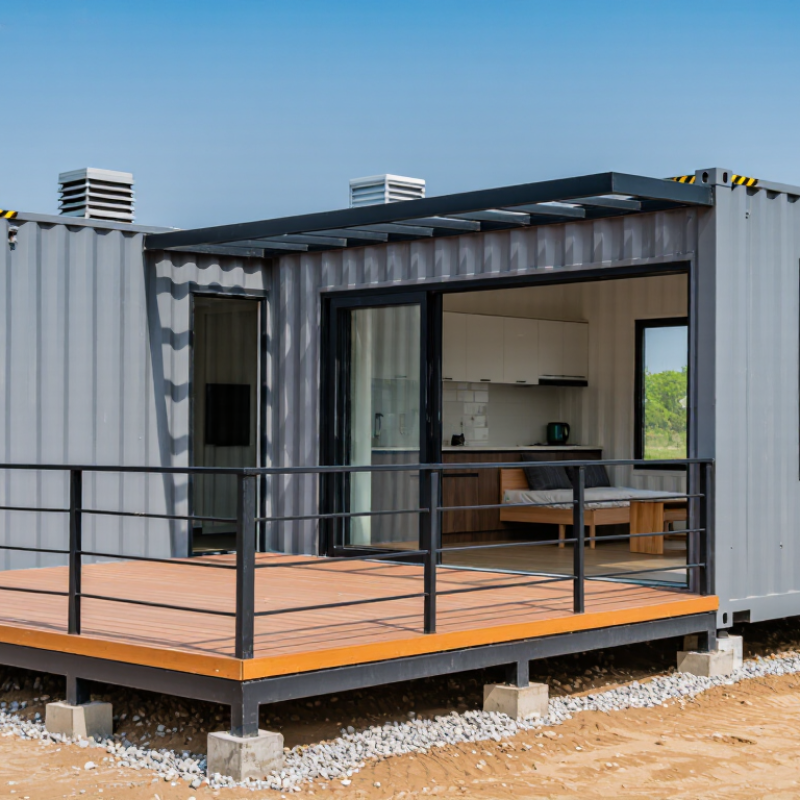
Before choosing a container, walk the site after rain. Soft ground, standing water, and a narrow access road can turn delivery into an expensive problem. Check where a truck can unload and whether cranes have room to work. Note overhead wires and nearby trees. A level pad matters, but drainage matters just as much. Water should flow away from the container, not collect beneath it.
Rules vary by location, so ask the local planning and building offices before buying. Confirm zoning, permits, foundation requirements, insulation standards, and fire-safety rules. Also ask whether the intended use qualifies as a dwelling. Keep written notes; a quick phone answer may not cover every detail.
Container condition deserves the same care. Inspect the roof, corners, doors, and floor for dents, corrosion, leaks, or chemical odors. A fresh coat of paint can hide trouble. Looks can deceive.
Tips:
Bring a flashlight, tape measure, and camera during inspection. Open and close both doors; they should move without forcing. Check the floor for soft spots, stains, or an unusual smell. Ask for repair and cargo history, but treat missing records as a reason to investigate further. I would not rely on appearance alone. A small flaw can become a costly repair once the container is cut for windows.
Plan the layout before buying a container. Measure the usable interior after allowing for insulation, framing, and wall finishes; those layers can noticeably narrow a compact room. Place beds and storage away from planned door and window openings. Container walls can lose strength when cut, so have a qualified structural professional review openings and reinforcement. One awkward truth: a beautiful floor plan can fail once ducts and pipes take their space.
Map utilities alongside the room plan. Group the kitchen, bathroom, and water heater where practical to shorten plumbing runs and simplify maintenance. Reserve clear access to the electrical panel, shutoff valves, and ventilation equipment. Detail roof and wall penetrations against water entry, and protect exposed steel from corrosion. The 2023 Global Status Report for Buildings and Construction, published by UNEP and GlobalABC, estimates that buildings and construction caused 37% of global energy- and process-related CO₂ emissions in 2022. Good insulation, shading, and efficient ventilation can reduce operating demand, but performance depends on the finished assembly and climate.
Tips: Mark every planned connection on a full-size floor sketch. Leave access panels where repairs may be needed. Measure twice. A little extra service space is rarely wasted.
| Planning Area | Typical Reference or Requirement | Practical Planning Guidance |
|---|---|---|
| Standard Container Length | Common nominal lengths are 20 ft (6.1 m) and 40 ft (12.2 m). | Choose the length according to the room plan, site access, transport limits, and local approval requirements. Confirm the actual unit dimensions before designing around it. |
| Standard Container Width | A standard container is typically about 8 ft (2.44 m) wide externally; a high-cube unit is generally the same width. | Interior width is smaller because of the wall and lining build-up. Sketch furniture and circulation using verified internal measurements rather than the external width. |
| Standard and High-Cube Height | Standard units are typically about 8 ft 6 in (2.59 m) high externally; high-cube units are about 9 ft 6 in (2.90 m). | Insulation, a service cavity, and ceiling finishes reduce usable interior height. Check the finished ceiling height against local building rules. |
| Interior Layout | A single container creates a narrow plan; combining units can provide a wider living area. | Place the kitchen and bathroom near shared plumbing routes where practical. Keep a clear path between the entrance, sleeping area, and exit. |
| Door and Window Openings | Cutting openings removes material from the container’s corrugated steel walls. | Plan openings before fabrication. Reinforcement may be required, especially for large openings or when containers are stacked; have the design reviewed by a qualified structural professional. |
| Foundation and Site | Foundations may include engineered pads, piers, or a slab, depending on soil, loads, climate, and local requirements. | Arrange a site and soil assessment where required. Provide stable, level support and plan drainage so water does not collect around the structure. |
| Structural Changes and Stacking | Container strength depends on its condition, load path, and support at appropriate structural points. | Do not assume that a modified container retains its original capacity. A qualified engineer should assess cut-outs, connections, stacking, and local wind, snow, and seismic loads. |
| Thermal Insulation and Condensation | Steel transfers heat readily, and warm indoor air can condense on cold surfaces. | Specify a continuous insulation and air-control strategy suitable for the local climate. Coordinate vapor control, ventilation, and thermal bridges with a building professional. |
| Electrical Connection | Electrical service capacity and installation rules depend on the home’s loads and local code. | List planned appliances, heating, cooling, lighting, and receptacles before sizing the service. Use a licensed electrician and obtain required inspections. |
| Water Supply | Water may connect to a public supply or an approved private source, subject to local rules. | Plan pipe routes, shutoff access, freeze protection, and space for a water heater. Confirm supply capacity and required permits before construction. |
| Wastewater and Drainage | Wastewater disposal may use a public sewer or an approved onsite system, depending on the property. | Confirm connection availability, fixture requirements, pipe gradients, and permits with the local authority. Keep service access clear for maintenance. |
| Heating, Cooling, and Ventilation | Equipment size depends on climate, insulation, air leakage, floor area, and occupancy. | Have heating and cooling loads calculated rather than selecting equipment by container size alone. Provide ventilation for indoor air quality and moisture control. |
| Permits and Code Review | Residential building, zoning, fire, energy, and utility requirements vary by location. | Consult the local building and planning authorities before purchasing or modifying a container. Submit drawings and engineering details when required. |
| Delivery and Installation Access | Transport vehicles and lifting equipment need adequate access and working space. | Check road access, overhead obstructions, turning space, ground bearing, and placement sequence. Coordinate delivery with foundation and utility preparations. |
Before turning a container into a living space, inspect the steel for rust, dents, failed welds, and water entry. Clean and repair the shell, then test doors and windows after rain. Small leaks matter. Mark cutouts and service routes before adding insulation; later changes can puncture the air barrier. Steel conducts heat readily, so bare ribs can become thermal bridges and cold spots. A common mistake is choosing insulation by thickness alone. Climate, indoor humidity, and the planned heating system also affect the assembly.
Install a continuous thermal layer where practical, and seal seams around the floor, roof, corners, and openings with compatible materials. Keep indoor air from reaching cold steel, where condensation may form. DOE’s Building America guidance emphasizes controlling air leakage and moisture as part of durable enclosure design. For context, ENERGY STAR estimates that sealing and insulating a typical home can save about 15% on heating and cooling costs; that figure is not a container-home guarantee. Measure twice. Check the insulation manufacturer’s moisture guidance before closing the walls, and leave a small inspection area accessible. I would not assume one wall detail suits every climate; that is where a careful plan can still miss something.
A comfortable container interior starts with a careful check of the shell.
Look for rust, leaks, and damaged floor areas before covering anything. Measure the interior after framing, not just the container’s exterior dimensions. Insulation and wall panels can reduce usable width more than expected. Small gaps matter. Choose insulation and moisture control for the local climate, and plan ventilation to limit condensation. A cold metal wall hidden behind a finished panel can become a damp problem.
Map the kitchen, bathroom, and sleeping area before running services.
Keep water lines accessible where practical, and protect them from freezing in cold regions. Position drains with a plumber’s guidance; small changes in floor height can affect their fall. Electrical circuits should be designed and installed by a qualified electrician. Mark outlets, lights, and appliance loads on the plan before closing the walls. Moving a wire later is awkward.
Fit the subfloor, then test doors, cabinets, and appliances before final trim.
A level floor helps, but the container may still have slight movement or unevenness. That detail is easy to miss. Leave access panels near shutoff valves and service connections. Check airflow with the space closed, especially around the bathroom and cooking area. It is tempting to finish every surface quickly, but a neat wall is less useful than a system you can inspect and repair.
Before furnishing a shipping container, check that it sits level on stable supports and that doors open without binding. Inspect welds, cut edges, and roof seams for rust or water entry. Any new window or door opening can affect structural strength, so have significant modifications assessed by a qualified professional. Small details matter.
Confirm that electrical work, heating, and ventilation are suitable for the space and meet local requirements. Ask a qualified electrician to inspect wiring before walls conceal it. Test smoke and carbon monoxide alarms, and keep a clear exit route from sleeping areas. Look for condensation after cool nights; damp insulation can hide behind a neat wall. I would not assume a dry-looking surface means the cavity is dry. Check again after rain.
Furnish around the container’s narrow footprint. Measure doorways and corners before bringing in a bed or sofa, then leave enough space to move safely. Choose stable furniture that can be secured against tipping, especially near sleeping areas. Keep heaters away from curtains, bedding, and stored belongings. Use shelves thoughtfully; heavy items belong low, not overhead. A small table, washable rug, and warm task lighting can make the room comfortable without crowding it. Test the layout. Live with it for a few days, then move anything that blocks a walkway or makes the exit harder to reach.